【Rust】Raspberry Piでブザーを鳴らす
schedule2025-07-23
schedule 約1分
💡 Summary
トランジスタ(S8050)とRustを用いてRaspberry Piでアクティブブザーを制御する方法。タクトスイッチと連携させ、ボタン押下時のみ鳴動する「Doorbell」と、トグル式に鳴動する「Alertor」の2パターンの実装例を紹介。
Table of Contents
概要
トランジスタやブザー、タクトスイッチを使ってブザーの鳴らし方をRustで制御します。
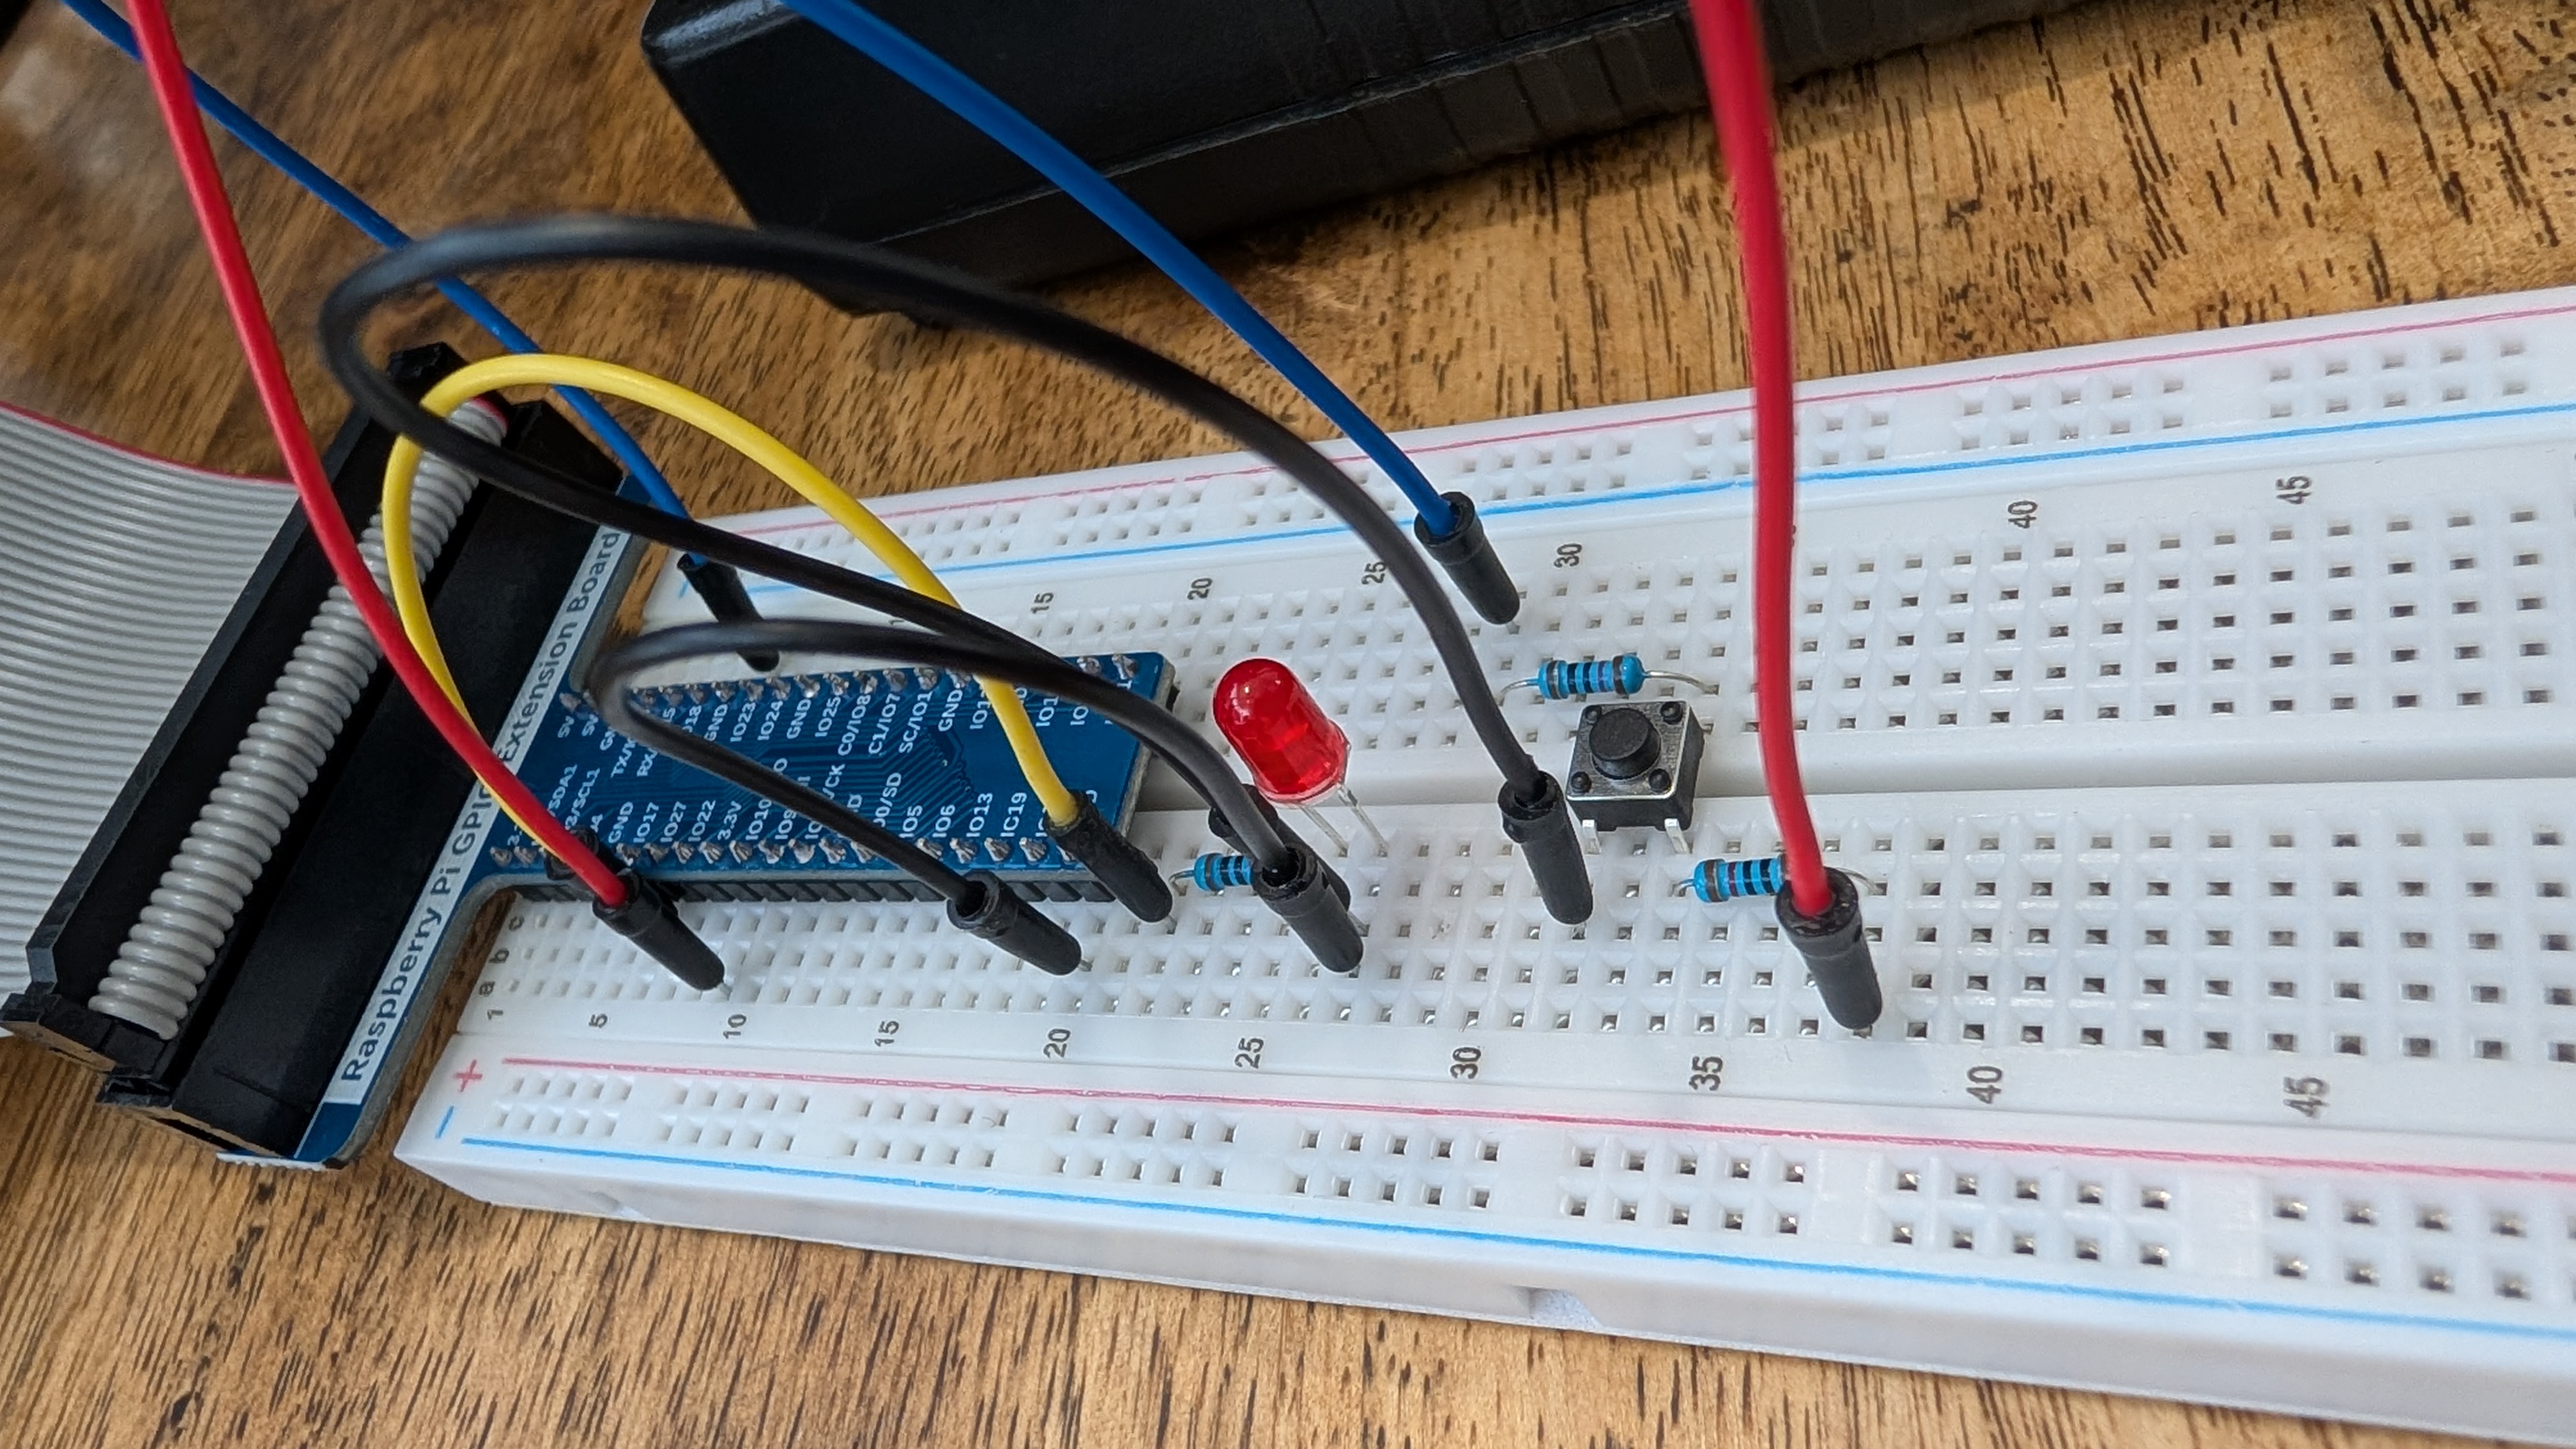
部品
つかう部品は以下の通りです。
- NPNトランジスタ(S8050)* 1
- タクトスイッチ * 1
- 抵抗 1kΩ * 1
- 抵抗 10kΩ * 2
- アクティブブザー * 1
- ジャンパー線 * 9
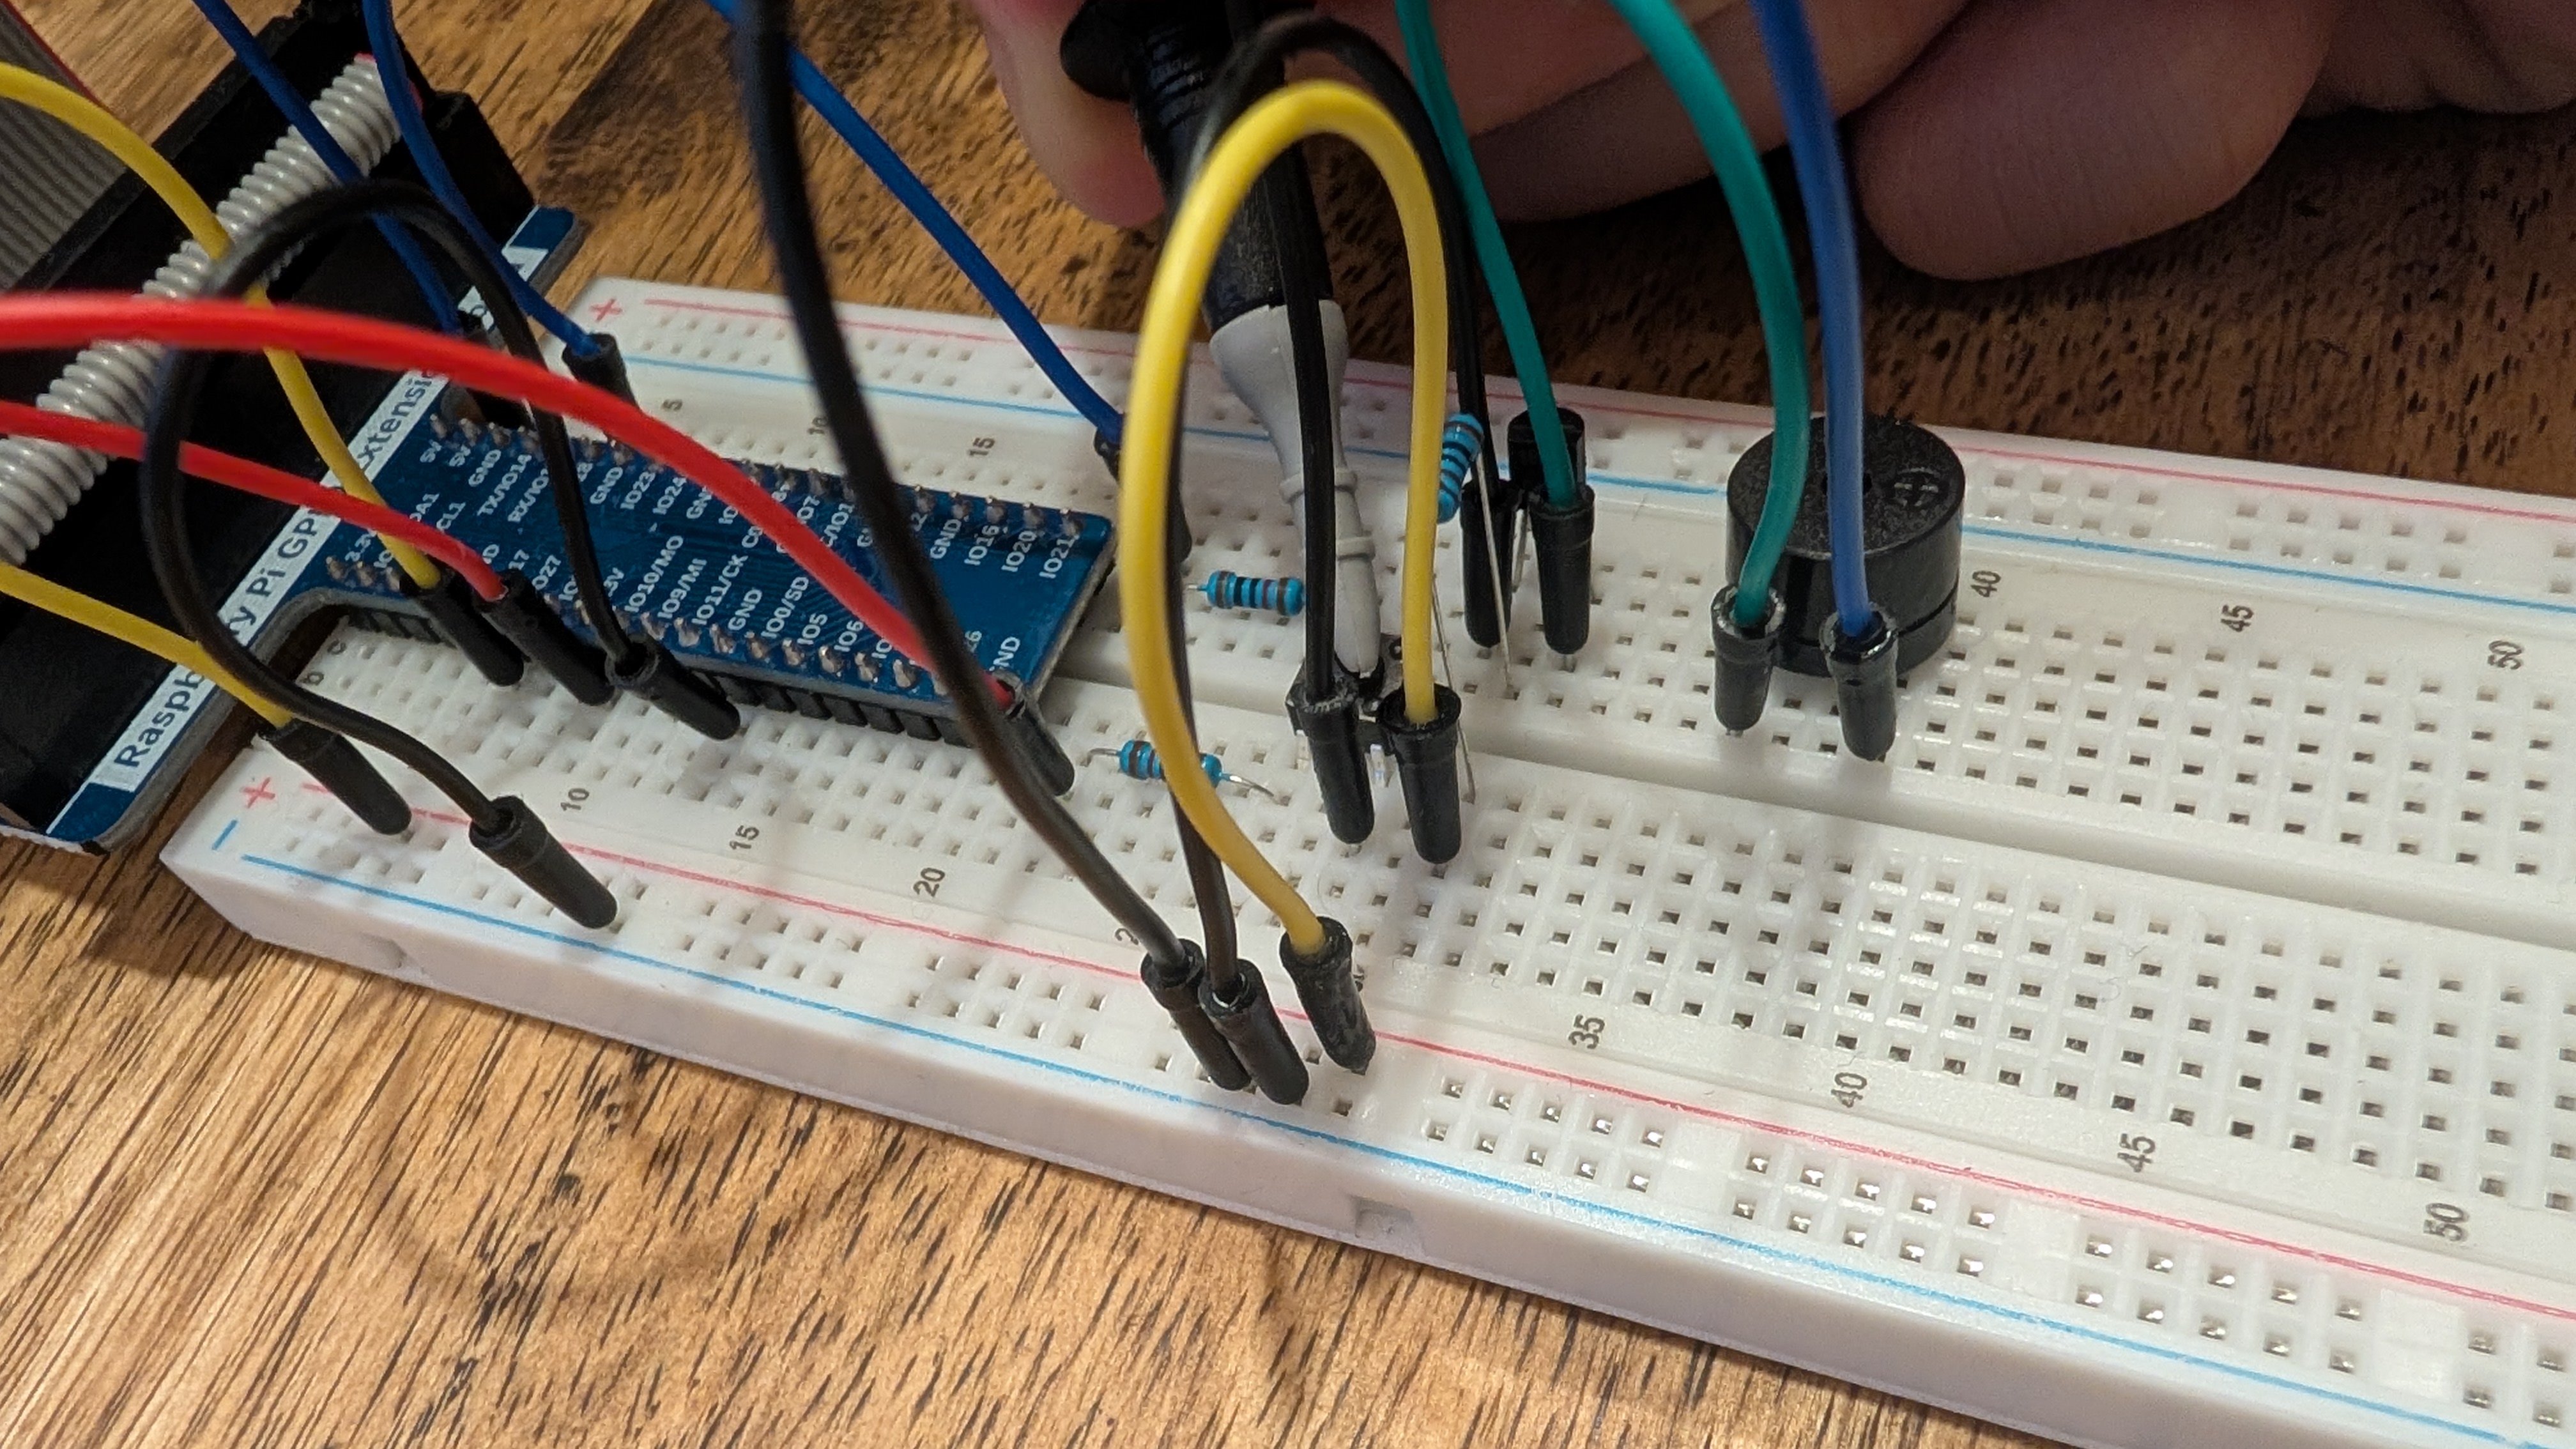
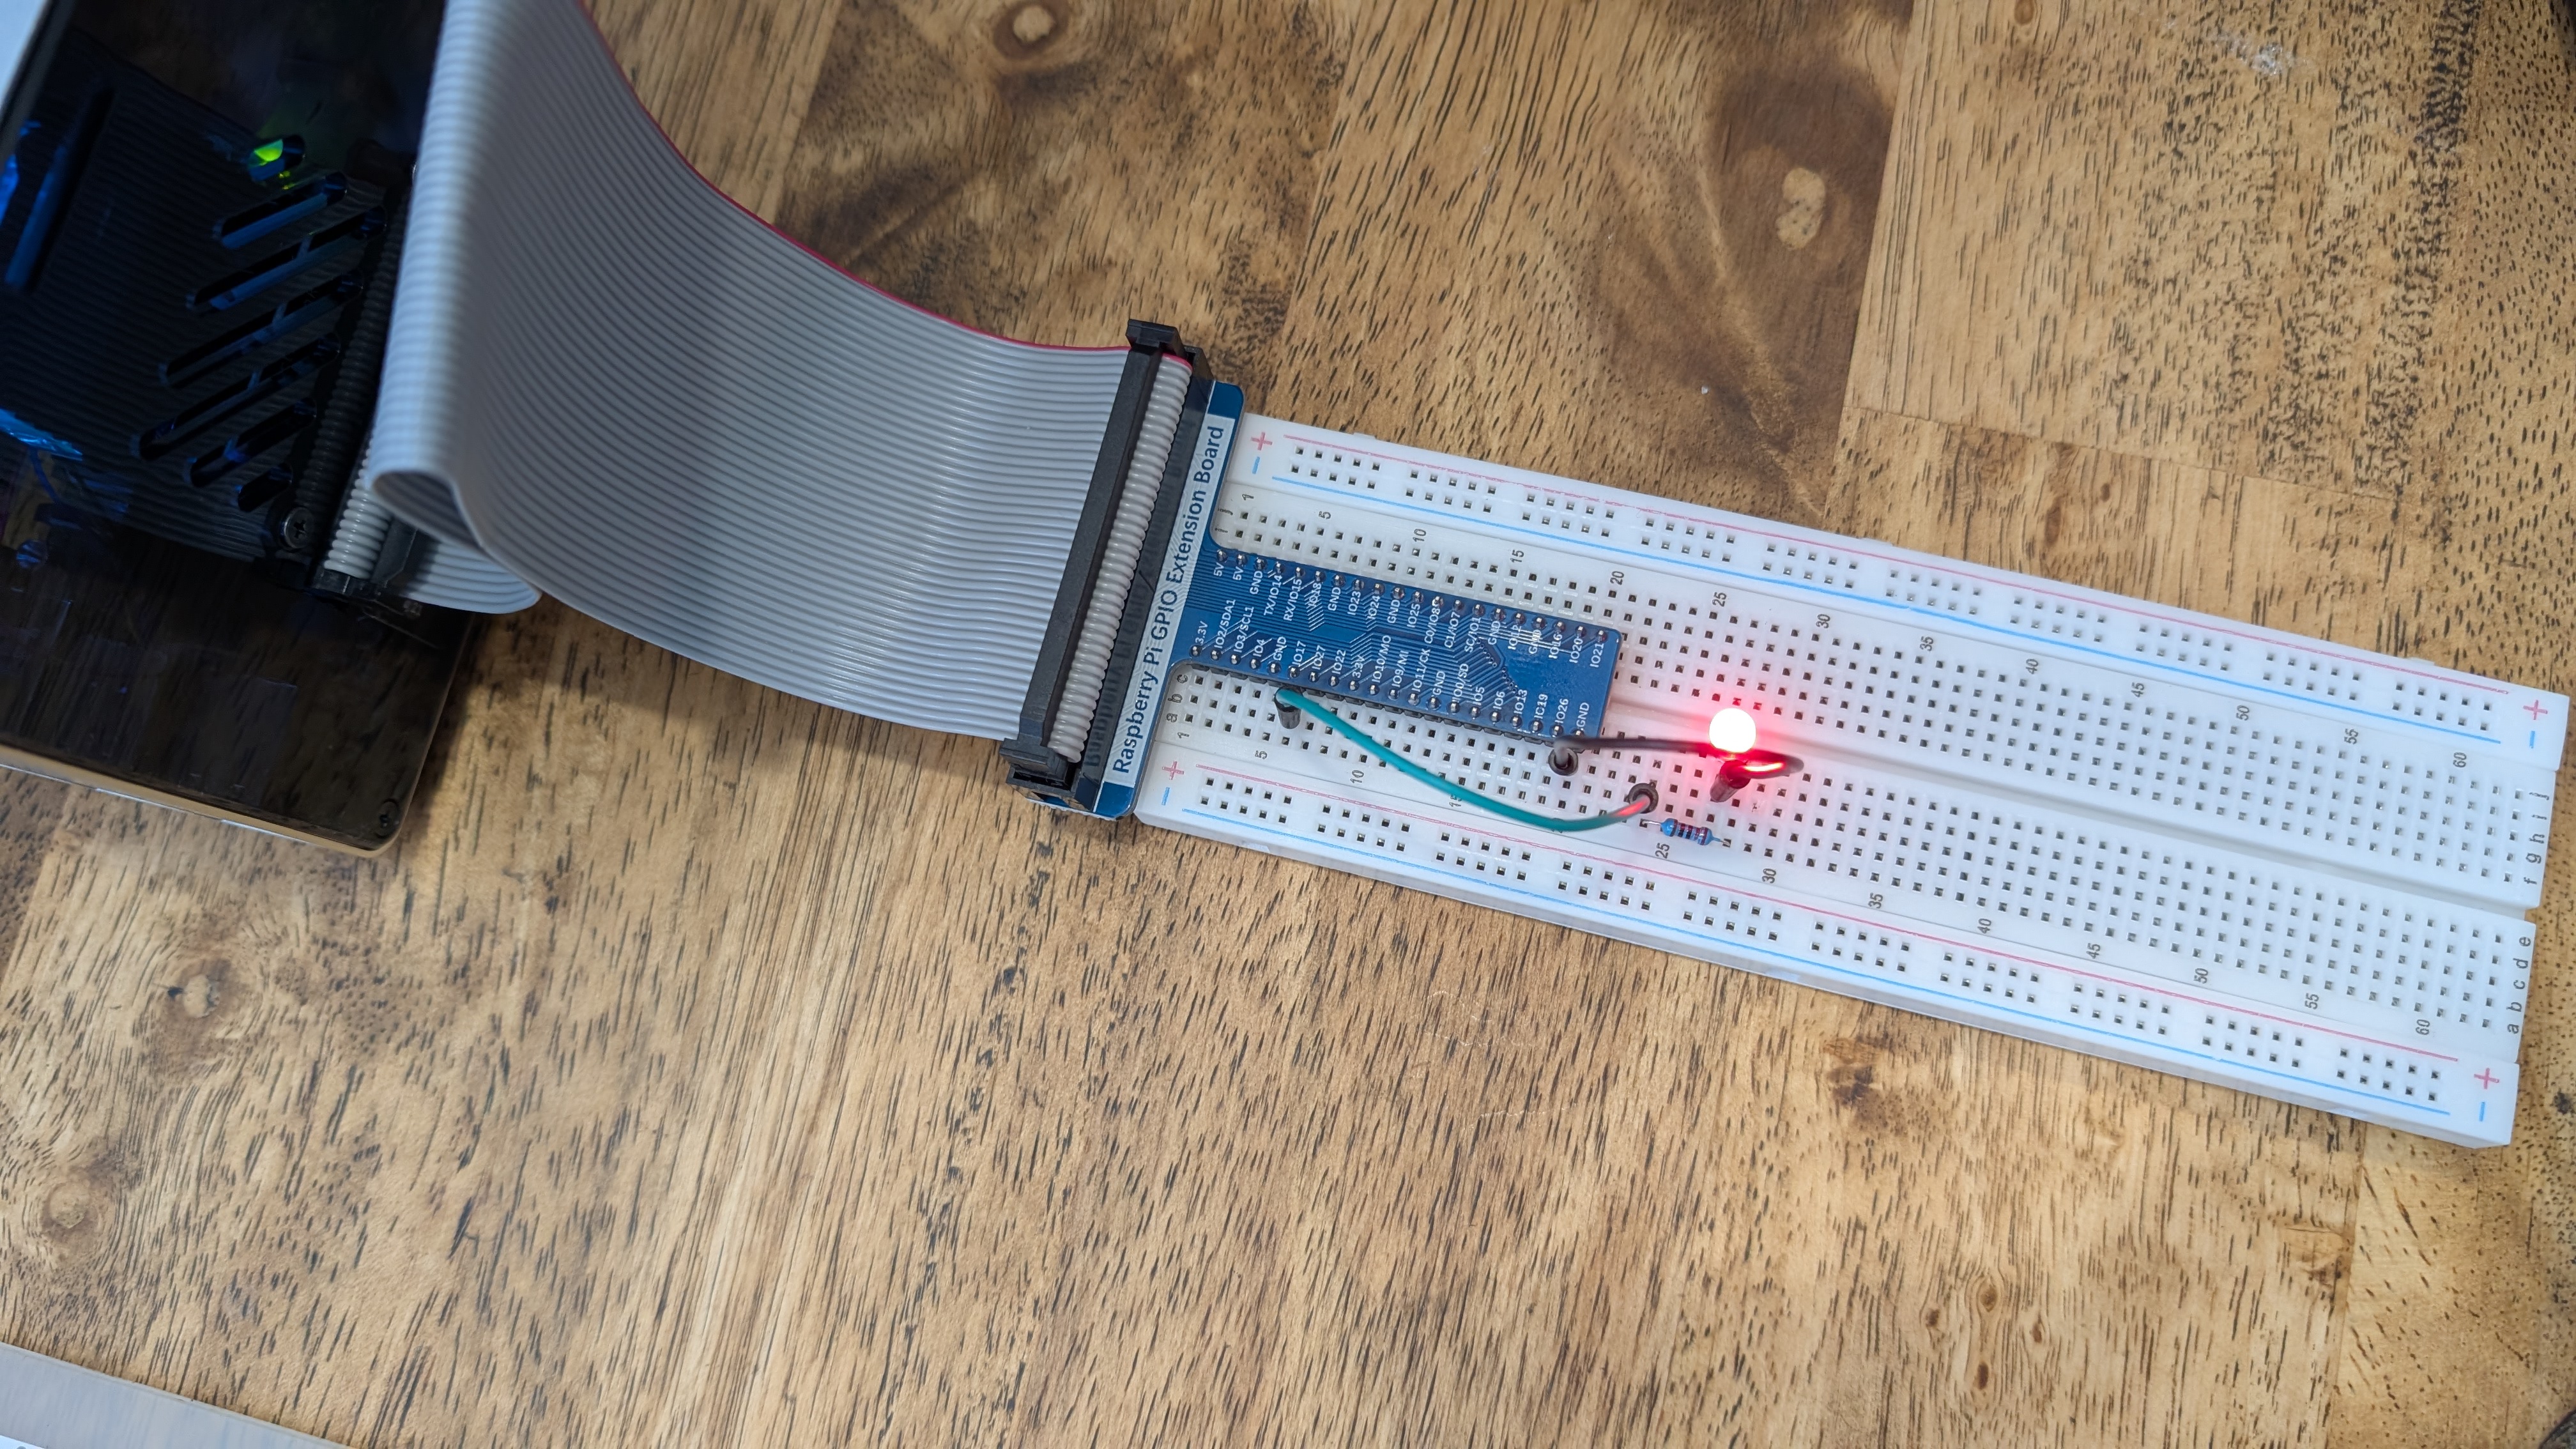
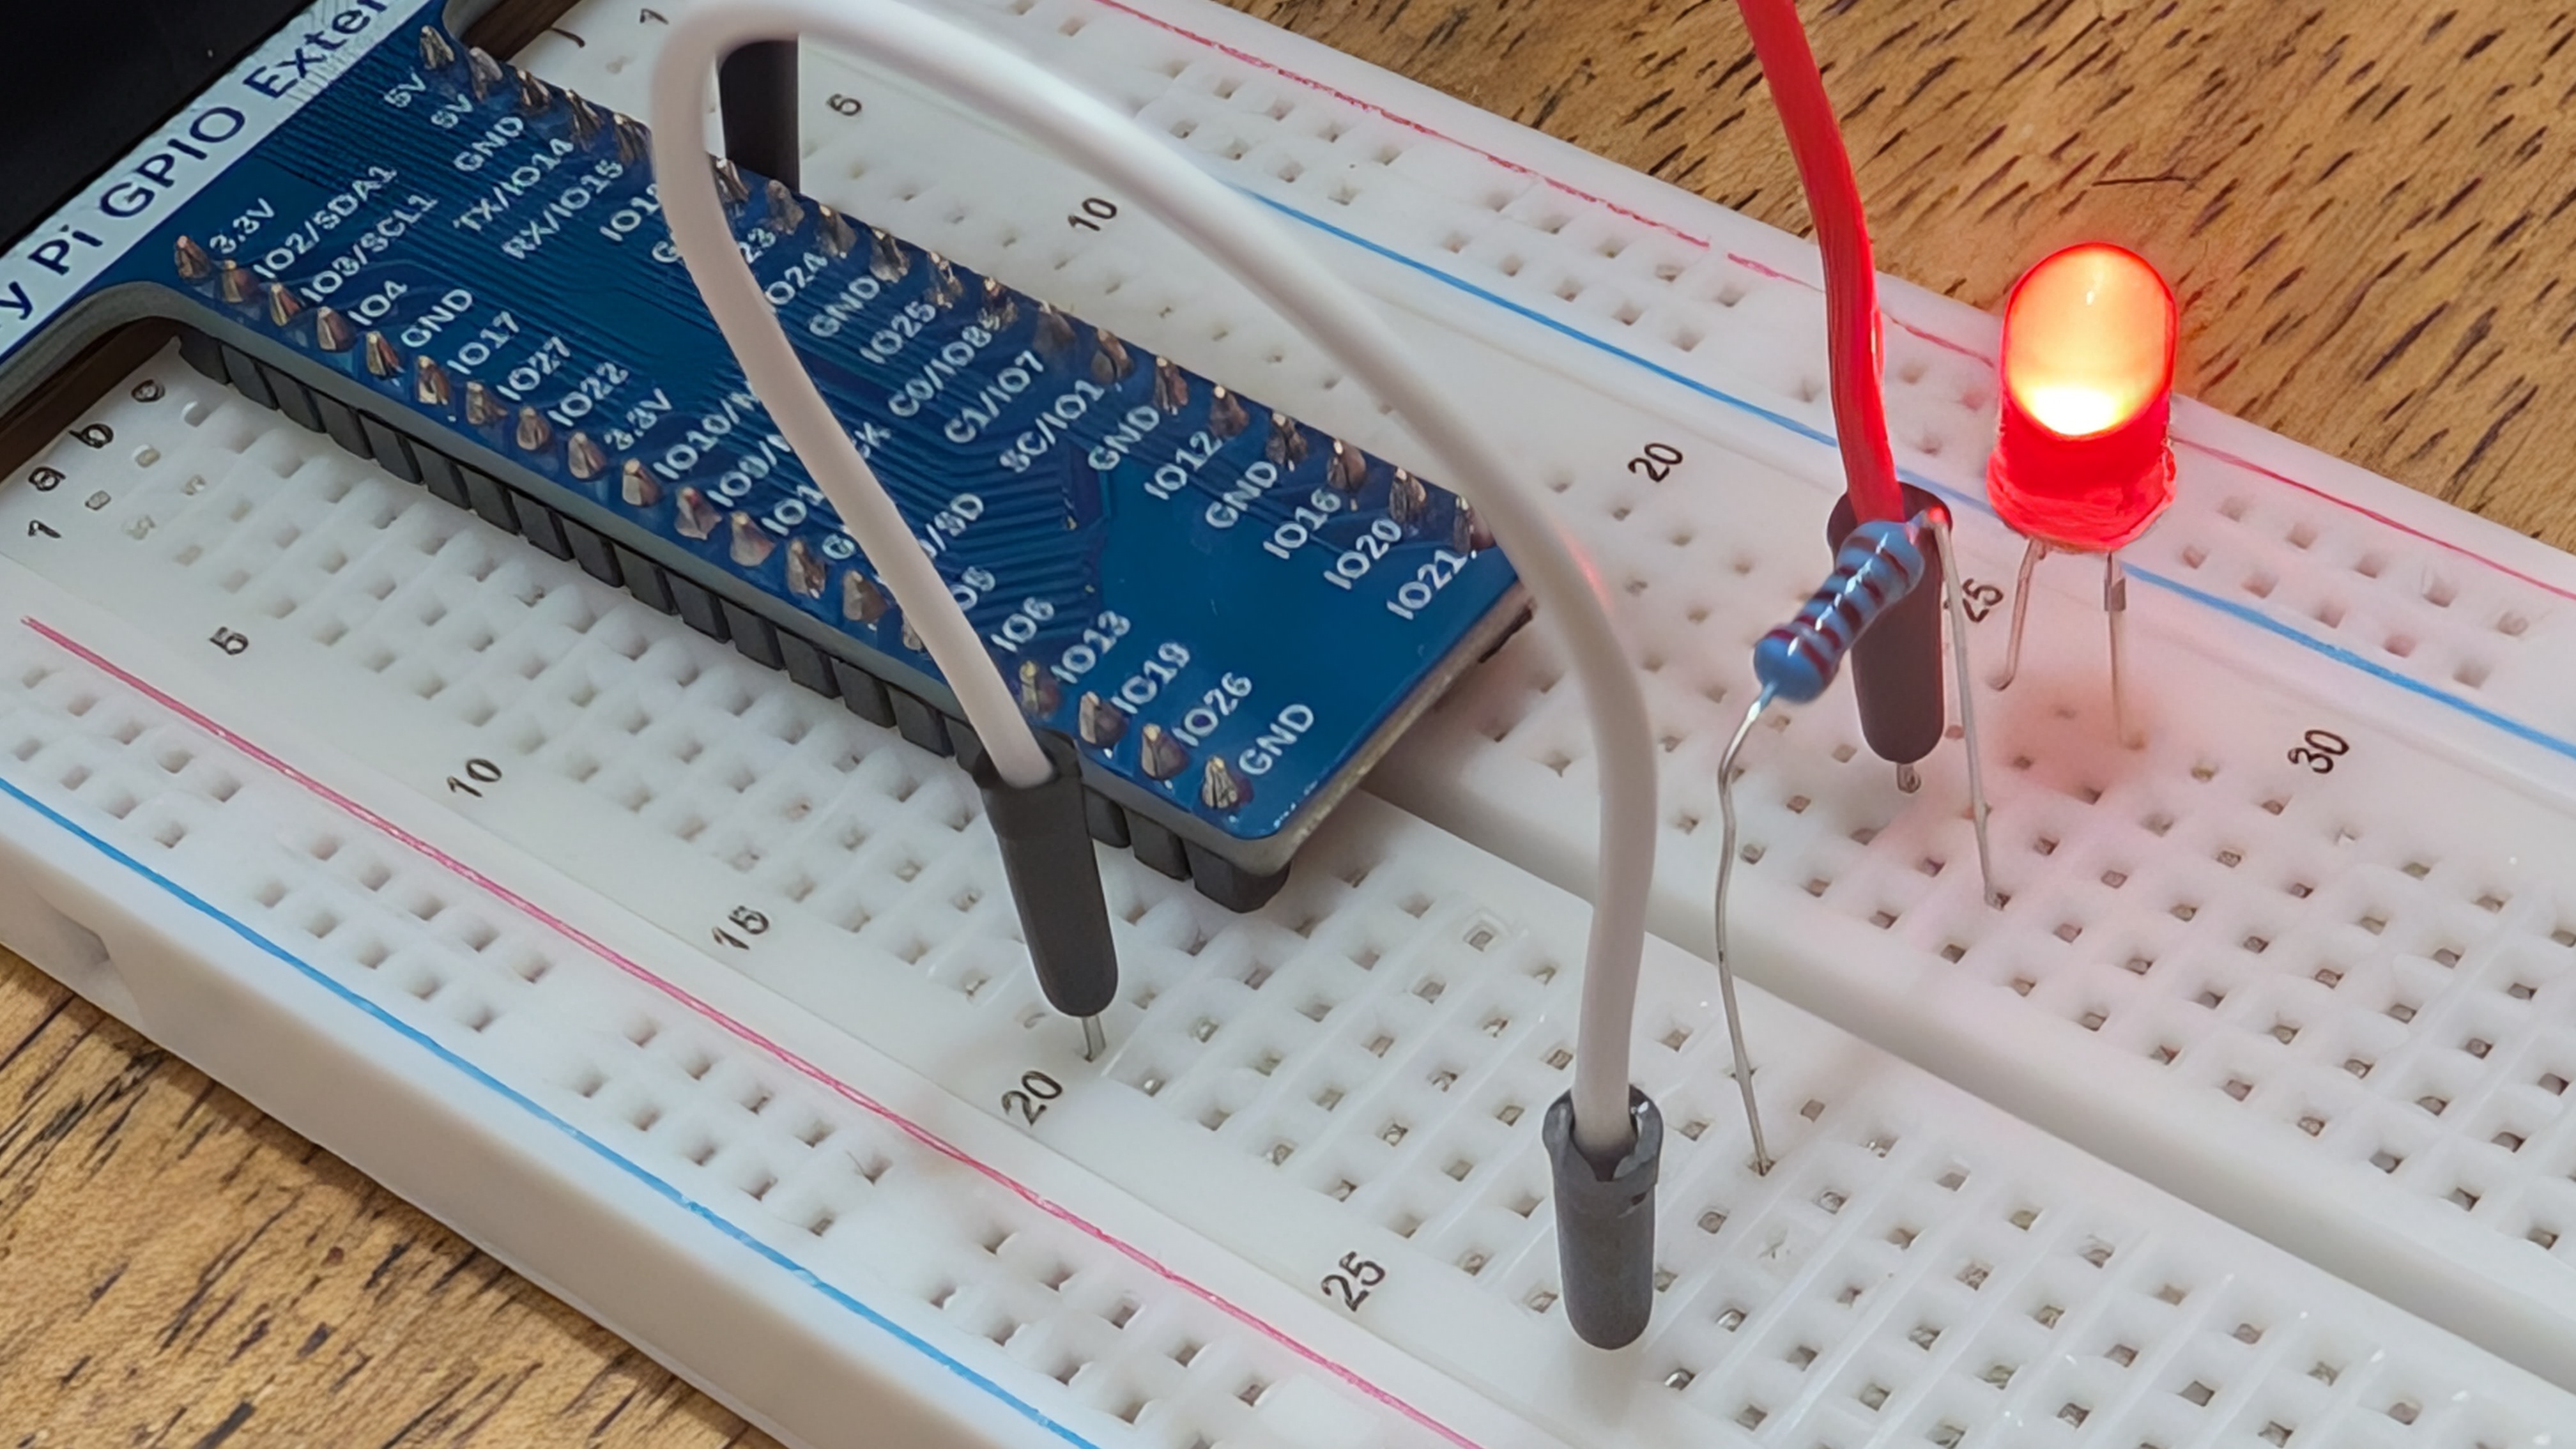
回路
回路はFreenoveをご確認ください。Raspberry PiのGPIOかから出力できる電流が小さいので、大きな電流を必要とするアクティブブザーを駆動させることができません。そのため、トランジスタで電流を増幅してアクティブブザーを動かせるようにするシンプルな回路が組まれています。
コード
cargoでrapllとctrlcを追加してコードを記述してください。
Doorbel
こちらはボタンを押すと一瞬ブザーが鳴るコードです。
use rppal::gpio::{Gpio, InputPin, OutputPin, Trigger};
use std::error::Error;
use std::sync::atomic::{AtomicBool, Ordering};
use std::sync::Arc;
use std::time::Duration;

const BUZZER_PIN: u8 = 17;
const BTN_PIN: u8 = 18;
const POLL_TIMEOUT_MS: u64 = 10;

fn main() -> Result<(), Box<dyn Error>> {
    print_startup_message();

    let (mut buzzer_pin, mut btn_pin) = initialize_gpio()?;
    initialize_buzzer(&mut buzzer_pin);
    setup_button_interrupt(&mut btn_pin)?;

    let running = setup_signal_handler()?;

    println!("Waiting for button press...");

    run_interrupt_loop(&running, &mut buzzer_pin, &mut btn_pin)?;

    cleanup(&mut buzzer_pin, &mut btn_pin)?;

    Ok(())
}

fn print_startup_message() {
    println!("Program is starting...");
}

fn initialize_gpio() -> Result<(OutputPin, InputPin), Box<dyn Error>> {
    let gpio = Gpio::new()?;
    let buzzer_pin = gpio.get(BUZZER_PIN)?.into_output();
    let btn_pin = gpio.get(BTN_PIN)?.into_input();
    Ok((buzzer_pin, btn_pin))
}

fn initialize_buzzer(buzzer_pin: &mut OutputPin) {
    buzzer_pin.set_low();
}

fn setup_button_interrupt(btn_pin: &mut InputPin) -> Result<(), Box<dyn Error>> {
    btn_pin.set_interrupt(Trigger::Both, None)?;
    Ok(())
}

fn setup_signal_handler() -> Result<Arc<AtomicBool>, Box<dyn Error>> {
    let running = Arc::new(AtomicBool::new(true));
    let r = running.clone();
    ctrlc::set_handler(move || {
        r.store(false, Ordering::SeqCst);
    })?;
    Ok(running)
}

fn run_interrupt_loop(
    running: &Arc<AtomicBool>,
    buzzer_pin: &mut OutputPin,
    btn_pin: &mut InputPin,
) -> Result<(), Box<dyn Error>> {
    while running.load(Ordering::SeqCst) {
        if let Some(_) = btn_pin.poll_interrupt(true, Some(Duration::from_millis(POLL_TIMEOUT_MS)))? {
            handle_button_interrupt(buzzer_pin, btn_pin);
        }
    }
    Ok(())
}

fn handle_button_interrupt(buzzer_pin: &mut OutputPin, btn_pin: &InputPin) {
    if is_button_pressed(btn_pin) {
        turn_on_buzzer(buzzer_pin);
        print_buzzer_on_message();
    } else {
        turn_off_buzzer(buzzer_pin);
        print_buzzer_off_message();
    }
}

fn is_button_pressed(btn_pin: &InputPin) -> bool {
    btn_pin.is_low()
}

fn turn_on_buzzer(buzzer_pin: &mut OutputPin) {
    buzzer_pin.set_high();
}

fn turn_off_buzzer(buzzer_pin: &mut OutputPin) {
    buzzer_pin.set_low();
}

fn print_buzzer_on_message() {
    println!("Button is pressed, buzzer turned on >>>");
}

fn print_buzzer_off_message() {
    println!("Button is released, buzzer turned off <<<");
}

fn cleanup(buzzer_pin: &mut OutputPin, btn_pin: &mut InputPin) -> Result<(), Box<dyn Error>> {
    println!("Ending program");
    let _ = btn_pin.clear_interrupt();
    turn_off_buzzer(buzzer_pin);
    Ok(())
}
Alertor
こちらはボタンを押している間ブザーがなりつづけるコードです。
use rppal::gpio::{Gpio, InputPin, OutputPin};
use std::error::Error;
use std::sync::atomic::{AtomicBool, Ordering};
use std::sync::Arc;
use std::thread;
use std::time::Duration;

const BUZZER_PIN: u8 = 17;
const BTN_PIN: u8 = 18;
const ALERTOR_FREQUENCY: f64 = 220.0; // 220Hz
const ALERTOR_DUTY_CYCLE: f64 = 0.5;  // 50% duty cycle
const LOOP_DELAY_MS: u64 = 10;
const ALERTOR_DURATION_MS: u64 = 100;

fn main() -> Result<(), Box<dyn Error>> {
    print_startup_message();

    let (mut buzzer_pin, btn_pin) = initialize_gpio()?;
    initialize_buzzer(&mut buzzer_pin);

    let running = setup_signal_handler()?;

    println!("Waiting for button press...");

    run_main_loop(&running, &mut buzzer_pin, &btn_pin)?;

    cleanup(&mut buzzer_pin)?;

    Ok(())
}

fn print_startup_message() {
    println!("Program is starting...");
}

fn initialize_gpio() -> Result<(OutputPin, InputPin), Box<dyn Error>> {
    let gpio = Gpio::new()?;
    let buzzer_pin = gpio.get(BUZZER_PIN)?.into_output();
    let btn_pin = gpio.get(BTN_PIN)?.into_input();
    Ok((buzzer_pin, btn_pin))
}

fn initialize_buzzer(buzzer_pin: &mut OutputPin) {
    buzzer_pin.set_low();
}

fn setup_signal_handler() -> Result<Arc<AtomicBool>, Box<dyn Error>> {
    let running = Arc::new(AtomicBool::new(true));
    let r = running.clone();
    ctrlc::set_handler(move || {
        r.store(false, Ordering::SeqCst);
    })?;
    Ok(running)
}

fn run_main_loop(
    running: &Arc<AtomicBool>,
    buzzer_pin: &mut OutputPin,
    btn_pin: &InputPin,
) -> Result<(), Box<dyn Error>> {
    while running.load(Ordering::SeqCst) {
        if is_button_pressed(btn_pin) {
            play_alertor_sound(buzzer_pin)?;
            print_alertor_on_message();
        } else {
            stop_alertor_sound(buzzer_pin)?;
            print_alertor_off_message();
        }

        thread::sleep(Duration::from_millis(LOOP_DELAY_MS));
    }
    Ok(())
}

fn is_button_pressed(btn_pin: &InputPin) -> bool {
    btn_pin.is_low()
}

fn play_alertor_sound(buzzer_pin: &mut OutputPin) -> Result<(), Box<dyn Error>> {
    buzzer_pin.set_pwm_frequency(ALERTOR_FREQUENCY, ALERTOR_DUTY_CYCLE)?;
    thread::sleep(Duration::from_millis(ALERTOR_DURATION_MS));
    Ok(())
}

fn stop_alertor_sound(buzzer_pin: &mut OutputPin) -> Result<(), Box<dyn Error>> {
    buzzer_pin.clear_pwm()?;
    buzzer_pin.set_low();
    Ok(())
}

fn print_alertor_on_message() {
    println!("alertor turned on >>> ");
}

fn print_alertor_off_message() {
    println!("alertor turned off <<<");
}

fn cleanup(buzzer_pin: &mut OutputPin) -> Result<(), Box<dyn Error>> {
    println!("Ending program");
    stop_alertor_sound(buzzer_pin)?;
    Ok(())
}
動作の様子
シンプルな回路でRust側で遊んだ pic.twitter.com/zb7gMyNoqU
— K (@rmc_km) June 9, 2025
まとめ
トランジスタの使い方を確認しつつ、Rustでブザーのなり方を制御する方法を学べました。回路自体がシンプルなのでトランジスタで電流を増幅させて、ブザーが動作するところを確認できました。電源が2系統必要ですがRaspberry Piであれば簡単に供給もできトランジスタの学習をシンプルにできます。今後も組み込みと回路をまとめて学び続けていきたいです。


コメントを読み込み中...