[Rust] 포텐셔미터로 LED 밝기를 제어하기
schedule2025-12-09
schedule 약 2분
개요
포텐셔미터(가변저항)를 사용하여 Rust로 LED 밝기를 제어하는 방법을 보여드립니다. Raspberry Pi는 기본적으로 아날로그 입력을 처리할 수 없으므로, ADC(아날로그-디지털 변환기) 모듈을 사용하여 아날로그 값을 디지털 값으로 변환합니다. 읽은 값에 따라 PWM(펄스 폭 변조)의 듀티 사이클을 조정하여 LED 밝기를 제어합니다.
사용 부품
이 프로젝트에 필요한 부품은 다음과 같습니다:
- Raspberry Pi (40 GPIO) × 1개
- GPIO 확장 보드 및 리본 케이블 × 1개
- 브레드보드 × 1개
- 회전 포텐셔미터 × 1개
- 저항 10kΩ × 2개
- ADC 모듈 (PCF8591 또는 ADS7830) × 1개
- LED × 1개
- 점퍼 와이어 M/M × 17개
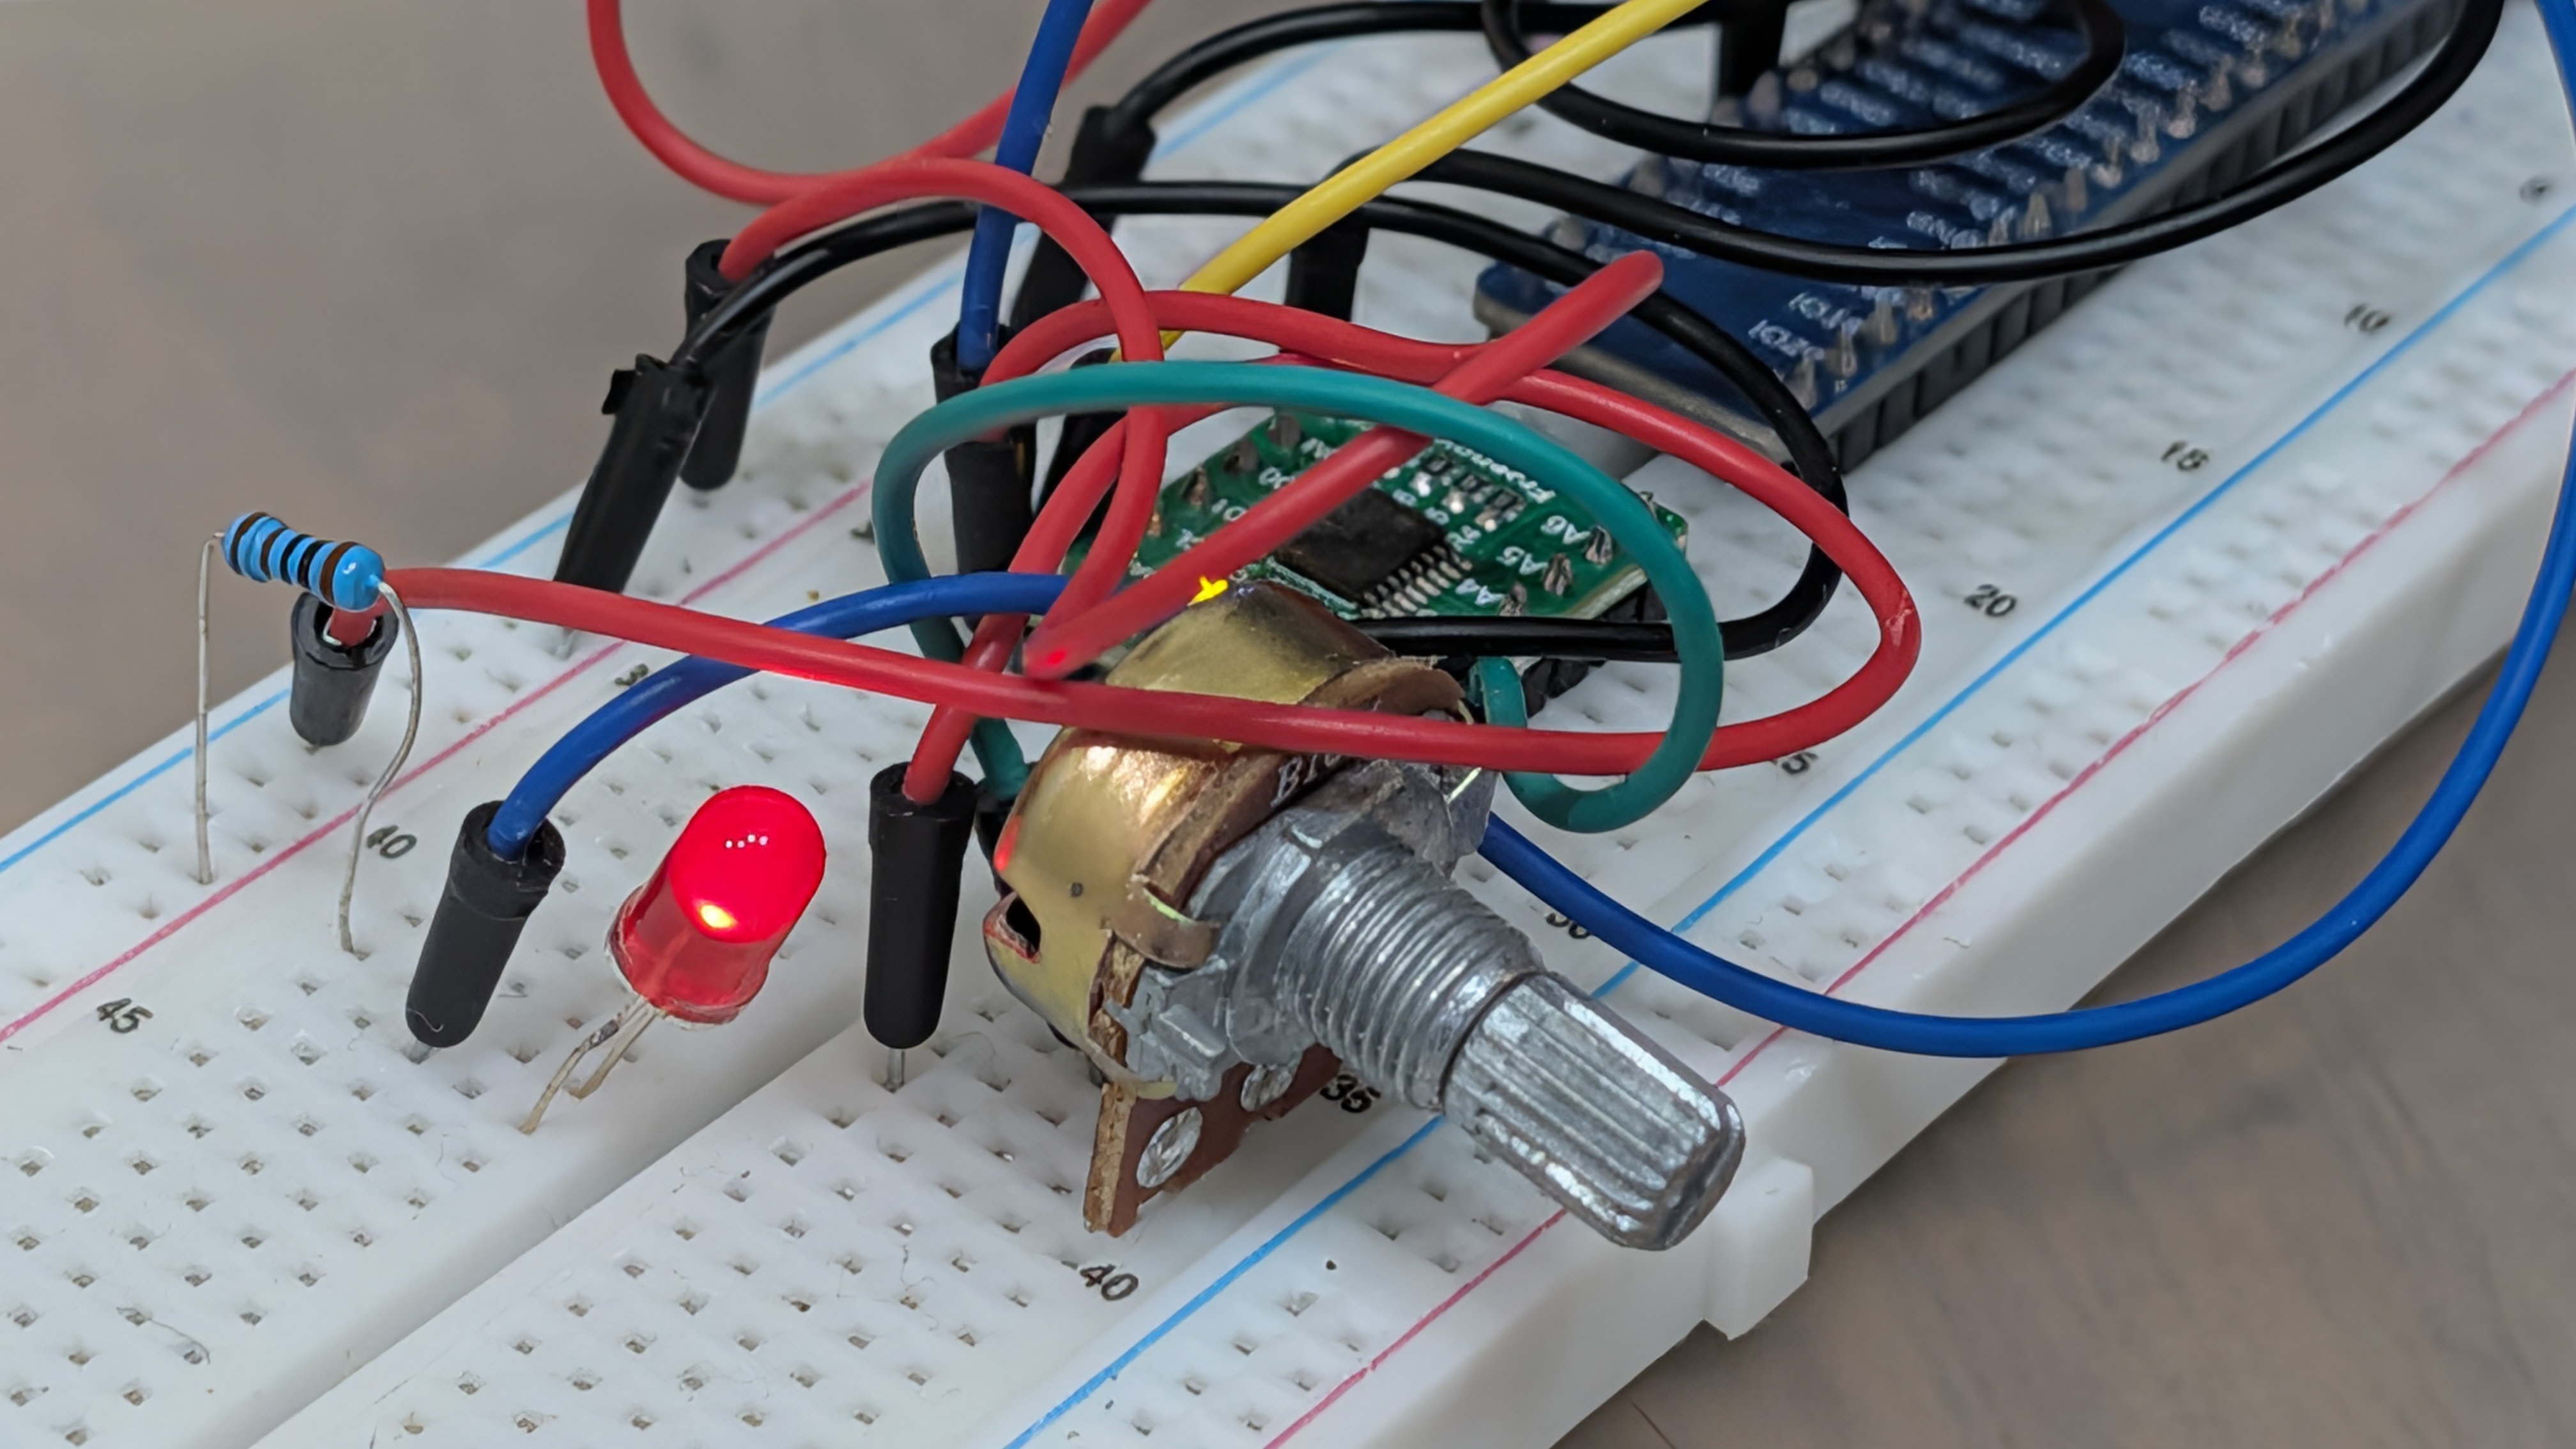
회로
회로도는 Freenove의 설명서를 참고하세요. PCF8591 또는 ADS7830 ADC 모듈 중 하나를 사용하여 회로를 구성할 수 있습니다.
코드
Cargo.toml에 rppal과 ctrlc를 추가하고 다음 코드를 구현하세요.
이 코드는 I2C 버스의 디바이스(PCF8591 또는 ADS7830)를 자동으로 감지하고 포텐셔미터에서 아날로그 값을 읽습니다. 읽은 값에 따라 별도의 스레드에서 실행되는 소프트웨어 PWM 제어로 LED 밝기를 조정합니다.
use std::error::Error;
use std::sync::atomic::{AtomicBool, AtomicU8, Ordering};
use std::sync::Arc;
use std::thread;
use std::time::Duration;

use rppal::gpio::Gpio;
use rppal::i2c::I2c;

const PCF8591_ADDR: u16 = 0x48;
const ADS7830_ADDR: u16 = 0x4b;
// GPIO 17 (BCM)
const LED_PIN: u8 = 17;

fn main() -> Result<(), Box<dyn Error>> {
    println!("Program is starting ...");

    // Initialize I2C
    let mut i2c = I2c::new()?;

    // Detect I2C device with retries
    let mut is_pcf8591 = None;

    for _ in 0..5 {
        if i2c.set_slave_address(PCF8591_ADDR).is_ok() && i2c.read(&mut [0]).is_ok() {
            is_pcf8591 = Some(true);
            break;
        } else if i2c.set_slave_address(ADS7830_ADDR).is_ok() && i2c.read(&mut [0]).is_ok() {
            is_pcf8591 = Some(false);
            break;
        }
        thread::sleep(Duration::from_millis(100));
    }

    let is_pcf8591 = match is_pcf8591 {
        Some(v) => v,
        None => {
            eprintln!("No correct I2C address found after retries,");
            eprintln!("Please use command 'i2cdetect -y 1' to check the I2C address!");
            eprintln!("Program Exit.");
            std::process::exit(-1);
        }
    };

    println!(
        "Detected I2C device: {}",
        if is_pcf8591 { "PCF8591" } else { "ADS7830" }
    );

    // Shared state for SoftPWM
    let running = Arc::new(AtomicBool::new(true));
    let duty_cycle = Arc::new(AtomicU8::new(0));

    // Spawn SoftPWM thread
    let pwm_handle = {
        let running = running.clone();
        let duty_cycle = duty_cycle.clone();
        thread::spawn(move || {
            let gpio = match Gpio::new() {
                Ok(g) => g,
                Err(e) => {
                    eprintln!("Failed to access GPIO: {}", e);
                    return;
                }
            };

            let mut pin = match gpio.get(LED_PIN) {
                Ok(p) => p.into_output(),
                Err(e) => {
                    eprintln!("Failed to get GPIO pin {}: {}", LED_PIN, e);
                    return;
                }
            };

            // 1 kHz frequency = 1000 us period
            let period_micros = 1000u64;

            while running.load(Ordering::SeqCst) {
                let duty = duty_cycle.load(Ordering::SeqCst) as u64;

                if duty == 0 {
                    pin.set_low();
                    thread::sleep(Duration::from_micros(period_micros));
                } else if duty == 255 {
                    pin.set_high();
                    thread::sleep(Duration::from_micros(period_micros));
                } else {
                    // Calculate on/off times
                    // duty is 0..255
                    let on_time = (period_micros * duty) / 255;
                    let off_time = period_micros - on_time;

                    pin.set_high();
                    thread::sleep(Duration::from_micros(on_time));
                    if off_time > 0 {
                        pin.set_low();
                        thread::sleep(Duration::from_micros(off_time));
                    }
                }
            }
            // Turn off LED on exit
            pin.set_low();
        })
    };

    // Setup CTRL-C handler
    let running_clone = running.clone();
    ctrlc::set_handler(move || {
        println!("\nEnding program");
        running_clone.store(false, Ordering::SeqCst);
    })?;

    // Main loop
    while running.load(Ordering::SeqCst) {
        let value_result: Result<u8, Box<dyn Error>> = if is_pcf8591 {
            // PCF8591
            i2c.set_slave_address(PCF8591_ADDR)
                .and_then(|_| i2c.write(&[0x40]))
                .and_then(|_| {
                    let mut buf = [0u8; 1];
                    i2c.read(&mut buf)?;
                    i2c.read(&mut buf)?;
                    Ok(buf[0])
                })
                .map_err(|e| e.into()) // Convert rppal::i2c::Error to Box<dyn Error>
        } else {
            // ADS7830
            i2c.set_slave_address(ADS7830_ADDR)
                .and_then(|_| i2c.write(&[0x84]))
                .and_then(|_| {
                    let mut buf = [0u8; 1];
                    i2c.read(&mut buf)?;
                    Ok(buf[0])
                })
                .map_err(|e| e.into()) // Convert rppal::i2c::Error to Box<dyn Error>
        };

        match value_result {
            Ok(value) => {
                // Update PWM duty cycle
                duty_cycle.store(value, Ordering::SeqCst);

                // Display info
                // Voltage reference 3.3V
                let voltage = (value as f64 / 255.0) * 3.3;
                println!("ADC Value : {}, Voltage : {:.2}", value, voltage);
            }
            Err(e) => {
                eprintln!("Error reading I2C: {}", e);
                // Optional: add a small delay or just continue to retry
            }
        }

        thread::sleep(Duration::from_millis(30));
    }

    // Wait for PWM thread to finish
    let _ = pwm_handle.join();

    Ok(())
}
요약
Rust를 사용하여 I2C 통신으로 ADC 모듈에서 값을 읽고, 그 값을 사용하여 LED 밝기를 제어하는 방법을 구현했습니다. 소프트웨어 PWM 구현을 통해 부드러운 제어를 달성했습니다. PWM 제어와 메인 ADC 읽기 루프를 서로 다른 스레드로 분리함으로써 반응성 있는 동작을 보장합니다.


댓글을 불러오는 중...